
Give Your First Case a Clear End Point.
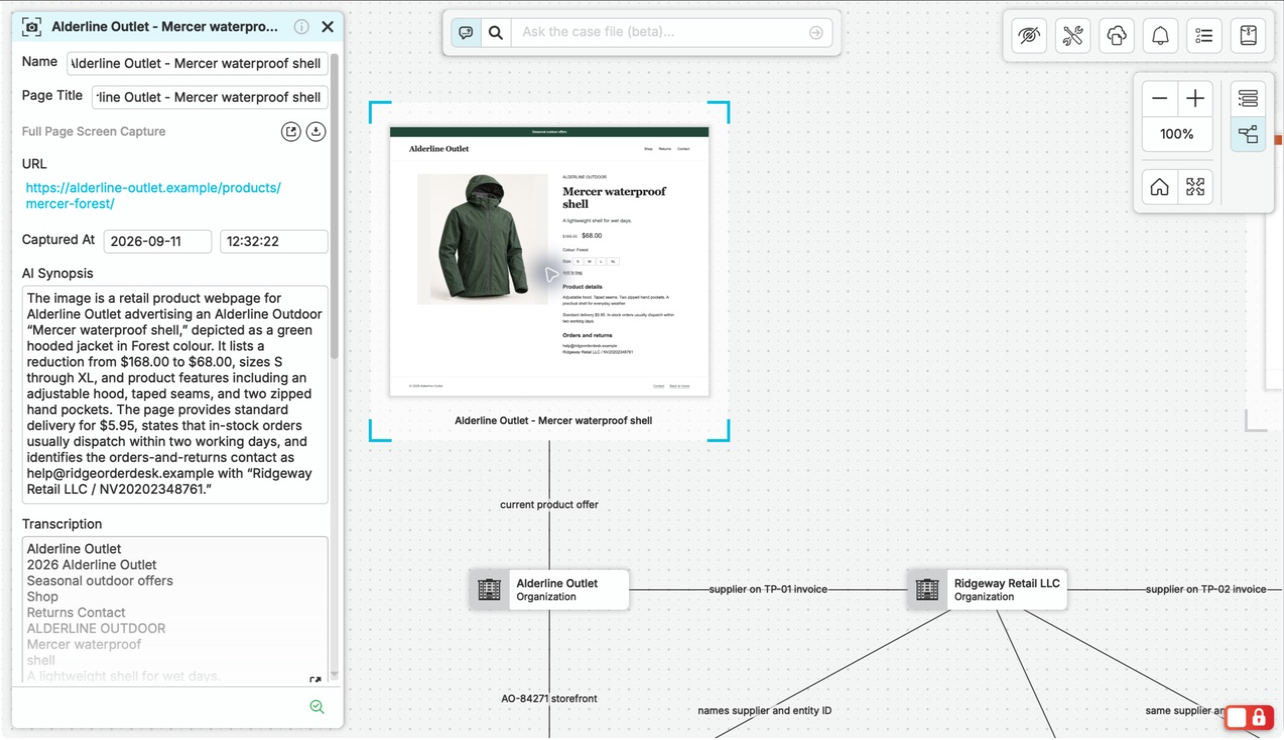
Choose two or three sources and a focused question, such as “Which dates do these records give for the same event, and where do they differ?” A photograph of a paper record, an exported file, and a browser capture can all contribute. Finish with a short finding, its supporting material, and the next investigative step.
Use material you have permission to collect and process. The locate, connected-account, and incident-review cases offer different starting points; follow the steps below with your own sources.
Before You Start: Your Account, App, and Material.
Start with a few files or notes, adding browser captures if the question calls for web research. You can add custom entity types and a larger case structure after you understand what the work needs.
Case Access
Use a nQuest account and a context where you have permission to create and edit a case.
Desktop App
Install nQuest for Windows or Mac, or try the Linux beta.
Browser Tools for Web Research
If you plan to capture web material, install the capture extension for Chrome, Firefox, or Edge on Windows or macOS, or for Chromium and Firefox on Linux.
Case Answers
Case questions require AI enabled on your account. Contact us for setup help if the query is unavailable.
Collect, Ask, and Check.
Create the Case Around Your Question
Select the context where you will work and choose New Case. Give the case a description that states the question and scope. Open the case file and unlock it for editing. If creation or editing controls are unavailable, check your permissions with the account administrator.
Bring in Your First Source
For a document, photograph, or exported record, add the file using the file option in the add-node tray, or drag and drop it into the graph. For browser material, capture a page, passage, or frame, then choose Capture Node from the add-node controls to open the capture manager and add or copy it into the case.
Record the Context
Open the document or capture and check its contents. Add a note explaining where the material came from and why it matters. Interview or field notes can also be a starting source. Repeat for the remaining material you need to answer your question.
Add Structure Where It Helps
Use a note to record your initial observations. If a connection is central to the question, link the relevant items and describe the relationship. A few collected items are enough to begin; you can add entities and more structure as the need becomes clear.
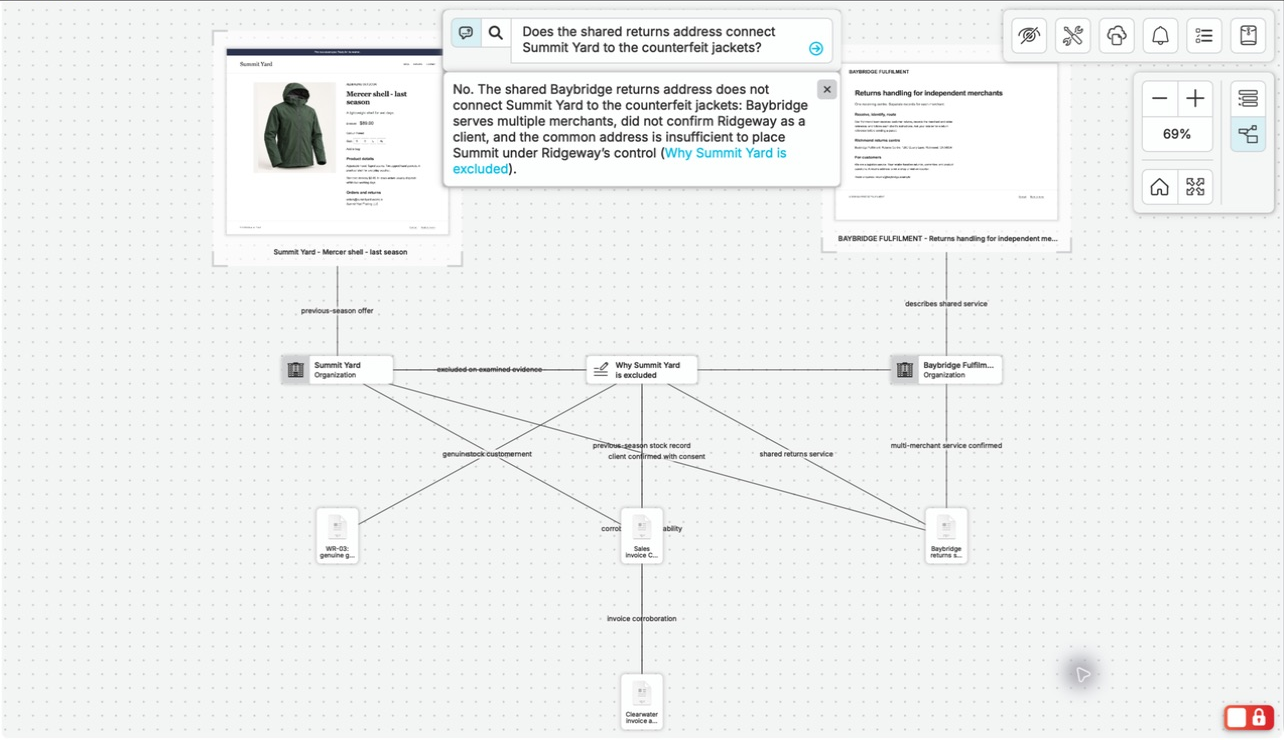
Ask One Focused Question
Use LLM Query in graph or list view. Ask which dates the collected records give for an event, where the accounts differ, or another question your material can answer. Read the answer and open relevant references to inspect the supporting material.
Write Your Finding
Add a note with the finding, its supporting items, remaining questions, and the next investigative step. If two records give different dates, identify the discrepancy and the follow-up that would resolve it.
Finish the Finding, Then Choose the Handoff.
Return to the case using the list or in-case search. Open your finding and follow its supporting items. The sources, observations, and next question stay together for the next time you pick up the investigation.
With your finding complete, choose how to share it: give a reviewer access to the case or prepare an export for delivery.
For a Reviewer Working in nQuest
Give an authorized reviewer viewer access to inspect the case and its sources. Summary-viewer access provides case-library details without opening the underlying case file.
For a File-Based Handoff
The case owner exports the material and includes an editable Word report draft. Review the report and supporting files, then prepare the final set for your recipient.
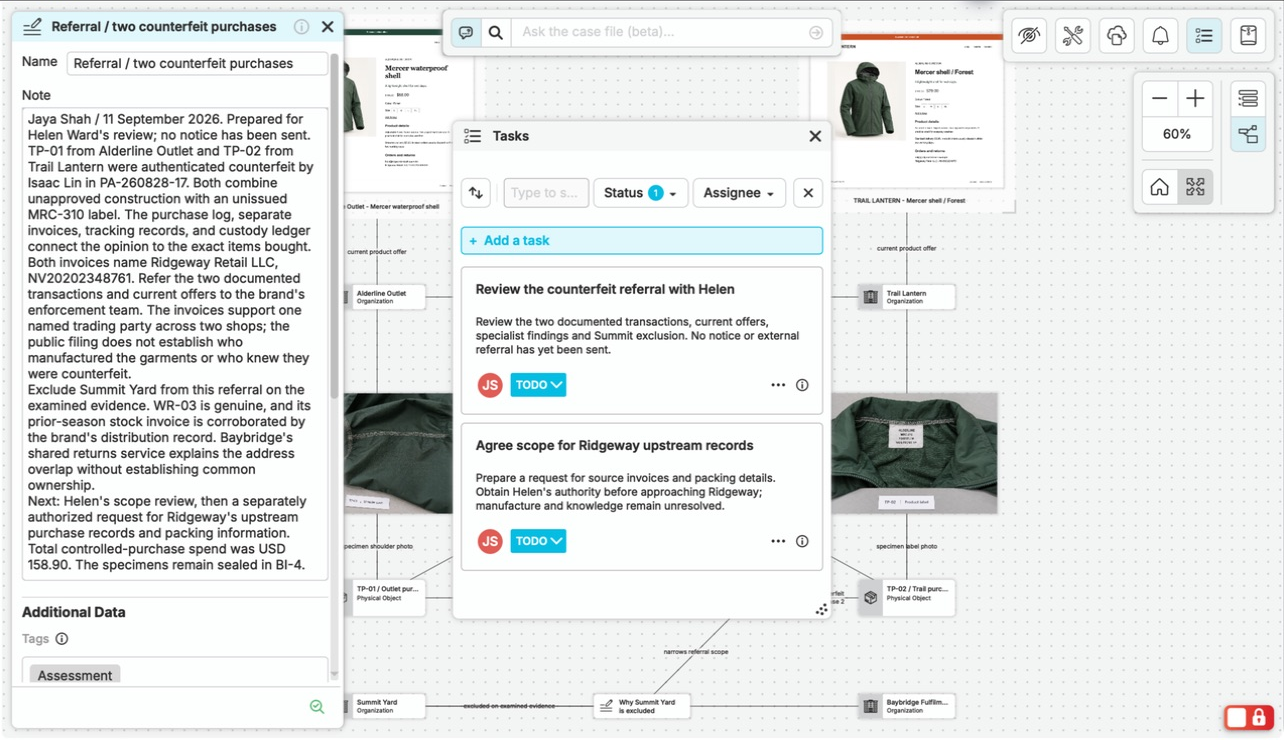
Keep the finding and its next steps together in nQuest.
Questions Worth Asking.
Do I need to configure custom entity types first?
No. Begin with a few documents, notes, or captures. Add entities and relationships when they help explain your particular question. A first case does not require a complete model of every future investigation.
How do I follow up on an unanswered question?
Open the related sources, note the missing detail, and identify the record or inquiry that could supply it. Add the new material to the case and use it to develop your finding.