
Working with Cases
Manage an investigation from its Overview → Workflow card in the Case Library. Select the right personal or group library first: workflow actions apply to that context.
Opening and Closing Cases
Section titled “Opening and Closing Cases”Creating a Case
Section titled “Creating a Case”- Open Libraries and choose your Personal Library or the group that should own the case.
- Select New Case.
- Check the Context, enter a useful Description, and choose any applicable case type, tags, or compartments.
- Select Create.
Creating the Juniper Court follow-up case from the new Personal Library
The case appears in the selected library. Select its row to review the Overview, or choose Open Workspace to start working with its contents.
If New Case is unavailable, check your permissions in the selected context and your account’s case limit. Group membership alone does not always permit case creation. When a non-admin creates a case for a group, nQuest delegates the case to that user.
Tracking Work in Progress
Section titled “Tracking Work in Progress”Use the Workflow card to record whether your context’s work is Open, In Progress, or Blocked, and to set its priority. Available actions depend on the current state and your permissions.
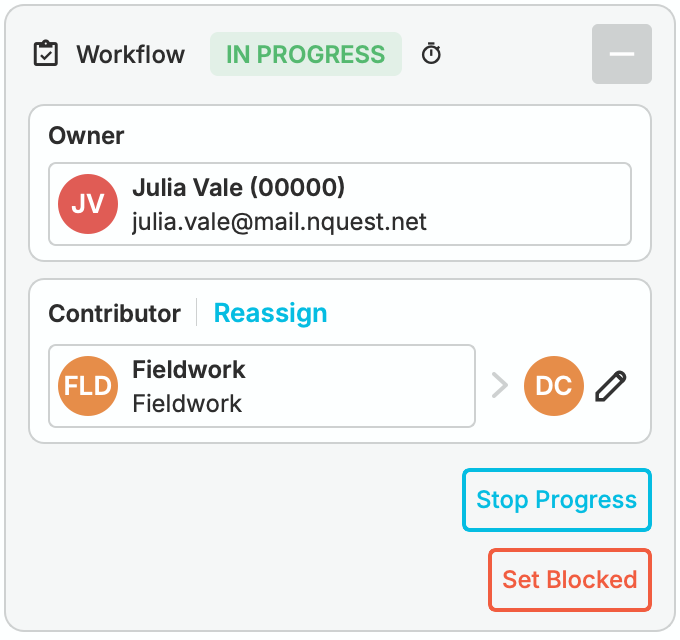
Fieldwork's In Progress contribution, with Daniel Cho as its delegate
An owner’s workflow and each contributor’s workflow are separate. Starting a contribution does not change another team’s status. Likewise, a task being Todo or Done does not automatically describe the state of the whole investigation.
Leave a note when a status change needs explanation. Use Tasks for specific next actions and Working with Others for assignments and handoffs.
Closing a Case
Section titled “Closing a Case”An owner can close a case from the Workflow card when closing is available. Choose Close, record the closing note and any applicable outcome, then confirm the dialog.
Closing the case prevents further editing until it is reopened. Finish active editing and resolve outstanding work before closing.
A contributor uses Return to finish its own contribution. Returning work does not close the owner’s case.
Reopening a Case
Section titled “Reopening a Case”As an owner, open the closed or archived case’s details and choose Reopen in Workflow. Add any useful explanation and confirm. The case becomes available for active work again.
Archiving a Case
Section titled “Archiving a Case”Closed cases are automatically archived after the library’s configured interval; the default is 14 days. Archived cases no longer appear in the normal library table. Use Case Search to find an archived case you have permission to see.
Archiving is not deletion. An owner can reopen an archived case.
Deleting a Case
Section titled “Deleting a Case”An owner can choose Delete Case for a closed or archived case when account policy permits it. Read the confirmation and add a note before submitting.
The case enters Pending Deletion, during which it can still be restored. Permanent removal occurs after the service’s retention period. Do not treat pending deletion as an indefinite backup.
Restoring a Case
Section titled “Restoring a Case”While the case is Pending Deletion, open its details and choose Restore. Add an optional note and confirm.
Restore returns it to a closed state. Choose Reopen separately if you want to resume work.
Case History Tab
Section titled “Case History Tab”Open History in the case header to see who changed the workflow, made assignments, or added notes.
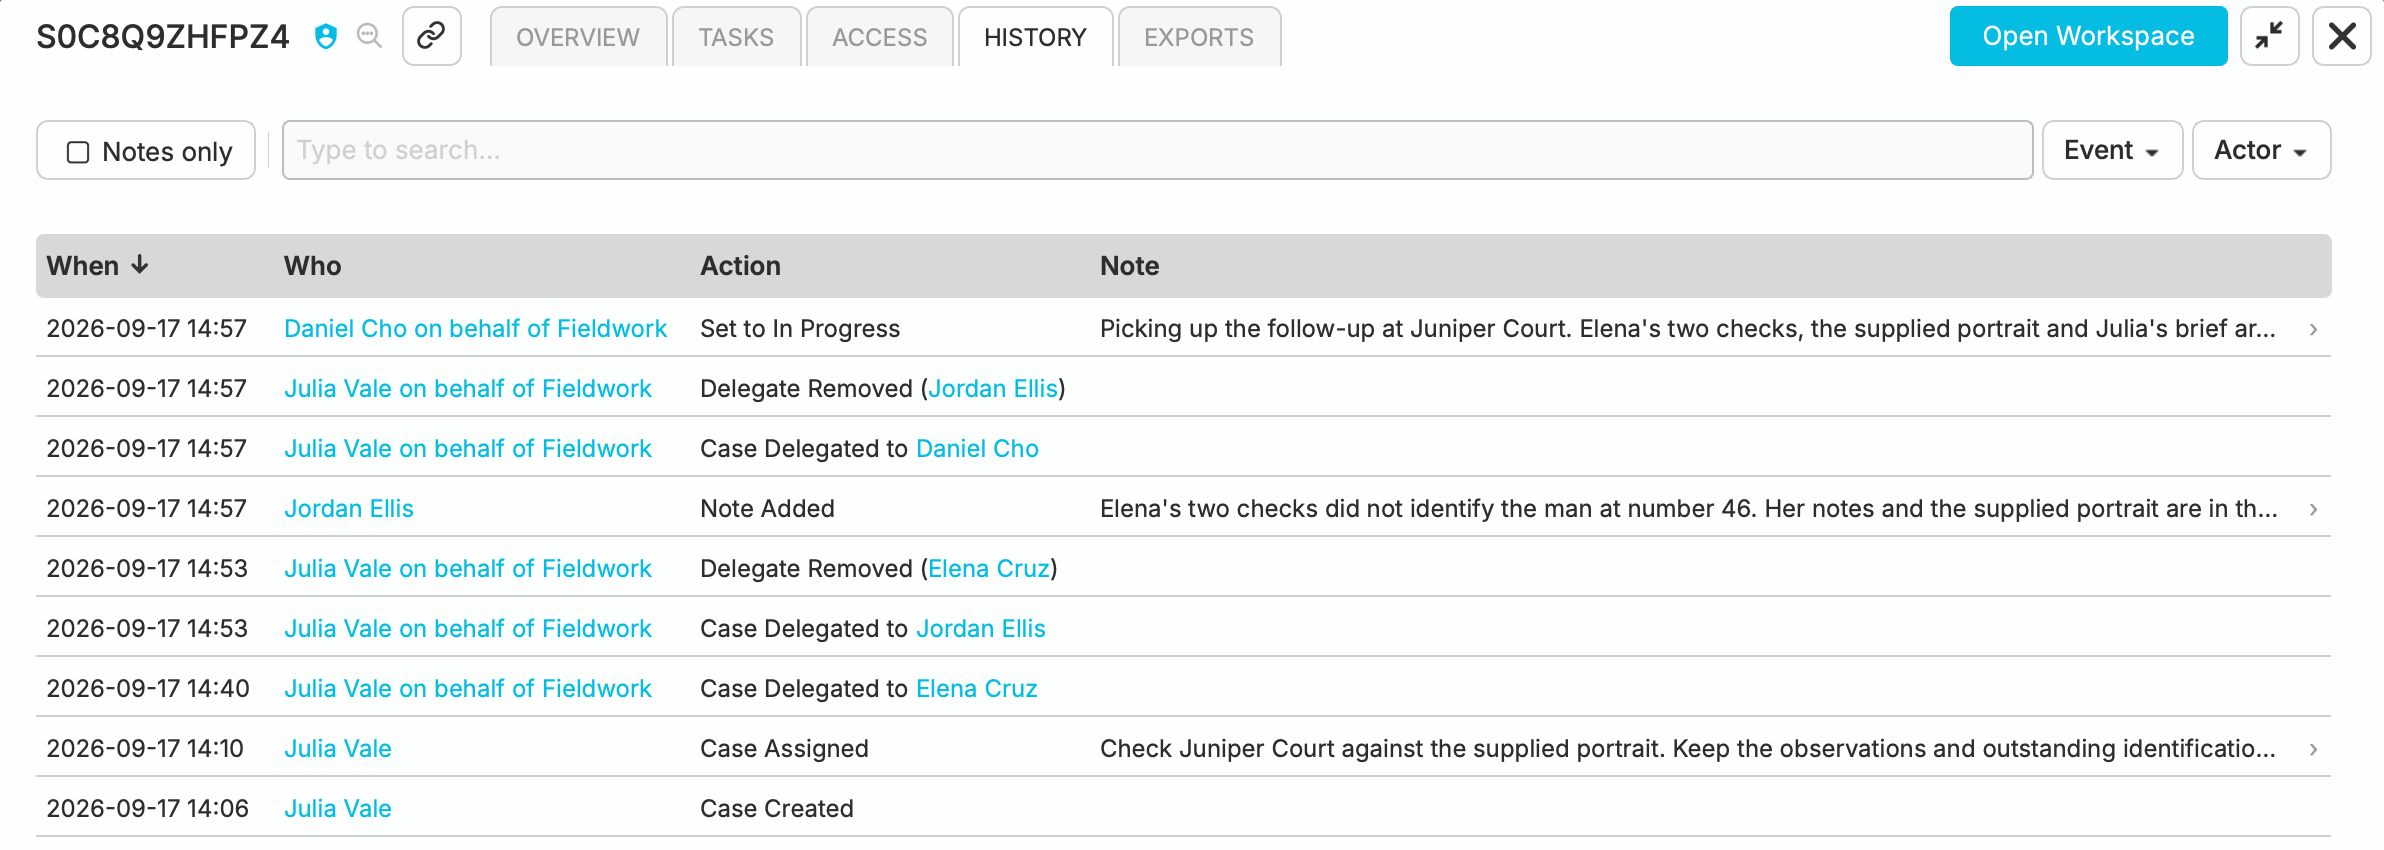
Case History showing Daniel's progress update, delegate handoffs, and notes, with event and actor filters
Use the search field and Event or Actor filters to find an entry. Notes only narrows the history to entries with notes. Expand a truncated note to read it in full; hover over a person or group to inspect its information card.
Adding a Note
Section titled “Adding a Note”- Return to Overview.
- In Activity, select Add Note.
- Write the update and select Submit.
The note becomes part of the case history. Use it to explain a decision, record a handoff, or tell the next investigator what remains unresolved. Adding a note does not by itself change status, ownership, or task assignments.